do you transfer sewing pattern markings onto interfacing
Transfer pattern markings. Add in the markings such as notches gather points and grainlines.
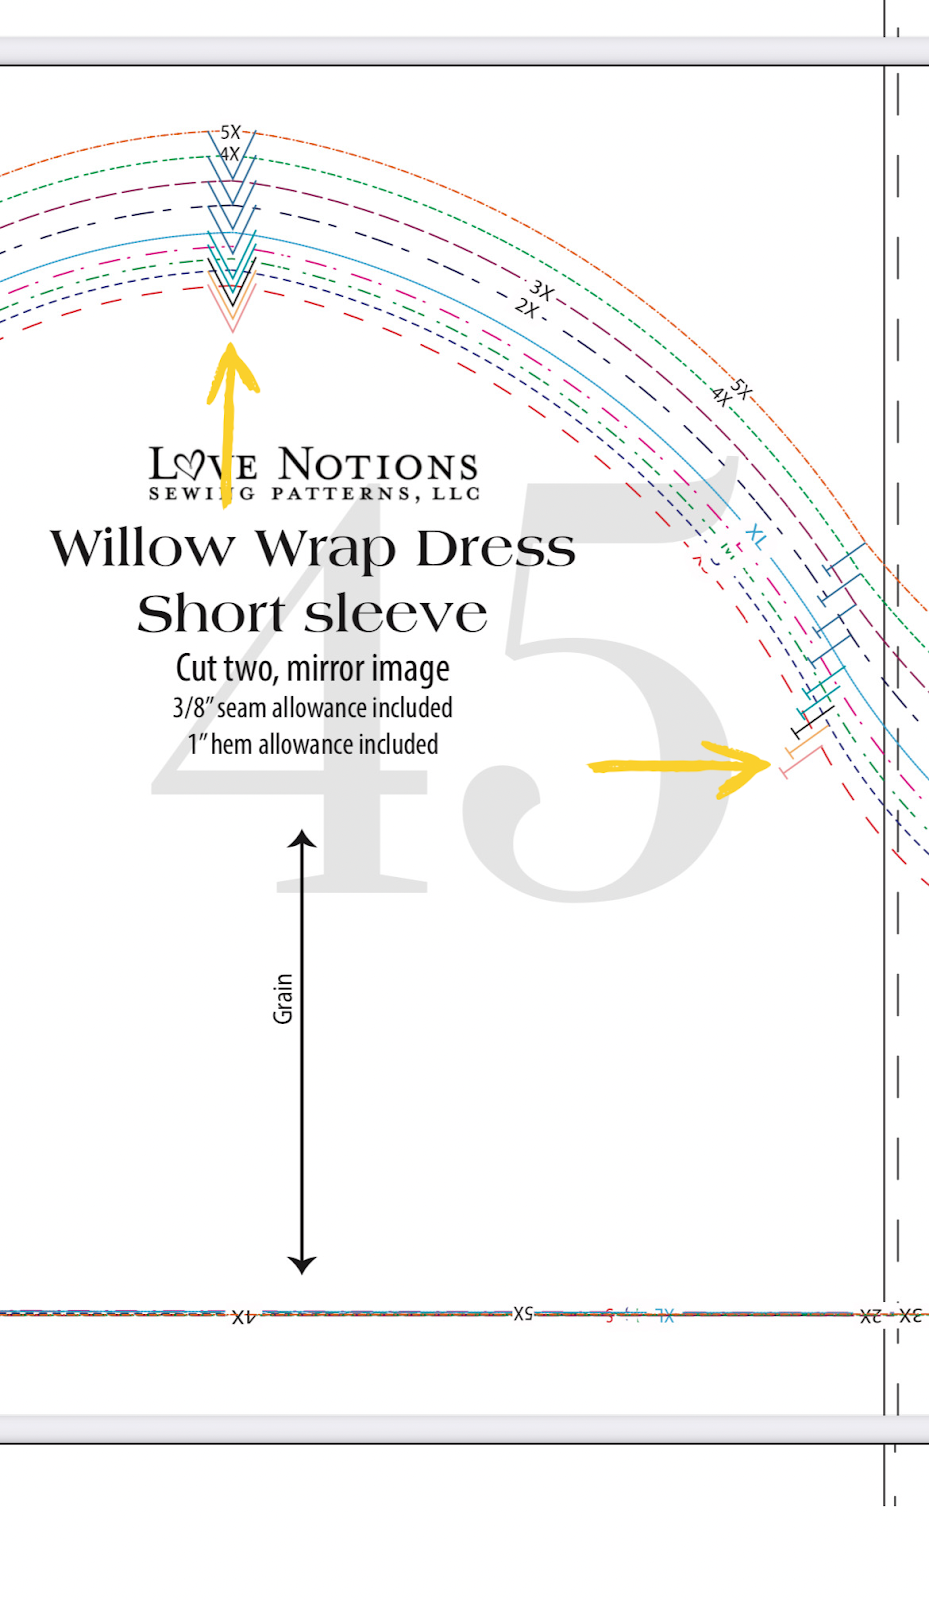
How To Interpret Pattern Markings With Willow Wrap Dress Love Notions Sewing Patterns
Trace the right size line of the original pattern.
. If you trace all your pattern lines and markings onto the pattern piece and then you decide to iron it before sewing all the transferred marking will disappear. Welcome to Sew Bliss. In this how to video tutorial learn how to transfer pattern markings.
I often use patterns that have been traced to oaktag which makes them easy to trace around. For the jacket front back and side back youll only. Join each underlining piece to the wrong side of each fashion fabric pattern piece so the transferred markings are visible.
This type of interfacing is great when your sewing project needs body fullness and shape but you dont want the original fabric to lose its properties and feel. If the fabric you have is slightly thin you can simply trace the markings under a lightbox or a window using a water-soluble pen. Then place your iron onto your pressing cloth and hold it in place.
My understanding is you do them through two layers then pull apart the layers and snip inbetween so you transfer. You rub chalk through the holes to indicate dart vanishing points. Pouncing You take a pounce wheel run it along the lines rub powder through the holes remove the sheet and draw or sew over the seam lines.
I have a cutting board so it was easy to cut out the muslin -- I used transfercarbon paper which shows up really well on white. You can also use tracing paper and a tracing wheel to transfer the patterns. I have no idea how to easily cut out the pattern pieces.
But this approach wont work on the real pattern. Either you are trying to transfer your pattern markings on a fabric or just measuring and cutting - you will need to find a way to mark your fabric. To create a stencil to trace markings such as eyebrow eyelash and mouth shapes take a large needle and punch 3 or 4 holes through each marking on the pattern piece 1 in each end and.
In this video you will learn some tips on how to transfer pattern markings to fabric. Get the basics on how to transfer sewing pattern markings. And finally watch this video to learn how to do 3 basic embroidery stitches backstitch French knot and Satin Stitch.
To transfer the markings push a pin through your pattern and fabric at the point you want to mark. Different methods covered in the video include transfer paper wheel and chalk plus a couple of other sewing tricks. Pick up the iron and move to the next section of the interfacing.
This video is about the basic supplies you will need to get started with hand embroidery. Get the basics on how to transfer sewing pattern markings. Check out my other videos about pat.
How to transfer sewing patterns to fabric tracing wheel soap chalk thread When you turn the second pocket piece over youll see that all the necessary lines are traced on the wrong side. Place your carbon paper with the carbonated side on the fabric Step 3. Place another pressing cloth down on.
Non-fusible interfacing is also sometimes called sew-in interfacing does not have an adhesive side and requires to be sewed onto original fabric from the wrong side. Use an iron set to the temperature instructed on the instructions. I show you start to finish picking the best marking tool making those marking easy and why you need to transfer the markings.
Use both hands to apply pressure when you move the iron in small circles for about 10 seconds. It helps if you iron the right side of the fabric so that the soap trace remains visible on the wrong side depending mainly on the material of the fabric and on how thick the trace was before ironing. Yes you could fuse on the interfacing first.
Again being careful not to shift the pieces around. Next time I will show you some tips for using colored pencils with your Everything Patterns. Simply place the pattern on a flat surface.
You simply have to put the tracing paper inside the fabric and draw the roller over the paper. My understanding is you do them through two layers then pull apart the layers and snip inbetween so you transfer the same making onto both sidespieces. Place the pattern piece on top of the fabric shape and trace around the eye shapes with an erasable fabric marking pen.
Cut the eye shapes out of the paper pattern piece and discard them. Do you transfer sewing pattern markings onto interfacing. Remember the Everything Patterns e-book.
The edges of the pattern are almost all curvy and the sizes differ by a few millimeters in many places.

Learn To Sew Get The Scoop On Pattern Layout For Cutting And Marking Sew Sew Lounge

How To Interpret Pattern Markings With Willow Wrap Dress Love Notions Sewing Patterns

The Sewing Pattern Tutorials 11 Pattern Symbols And Fabric Marking Tools The Fold Line

How To Read A Sewing Pattern For Fabric Layout And Cutting Sew Simple Home

Learn To Sew Get The Scoop On Pattern Layout For Cutting And Marking Sew Sew Lounge

3 Beginner Draping Pattern Markings Transferring To Paper Mood Sewciety
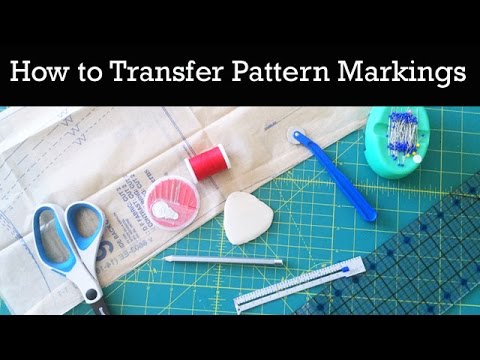
How To Transfer Pattern Markings To Fabric Youtube

How To Mark Your Fabric For Sewing Updated Youtube
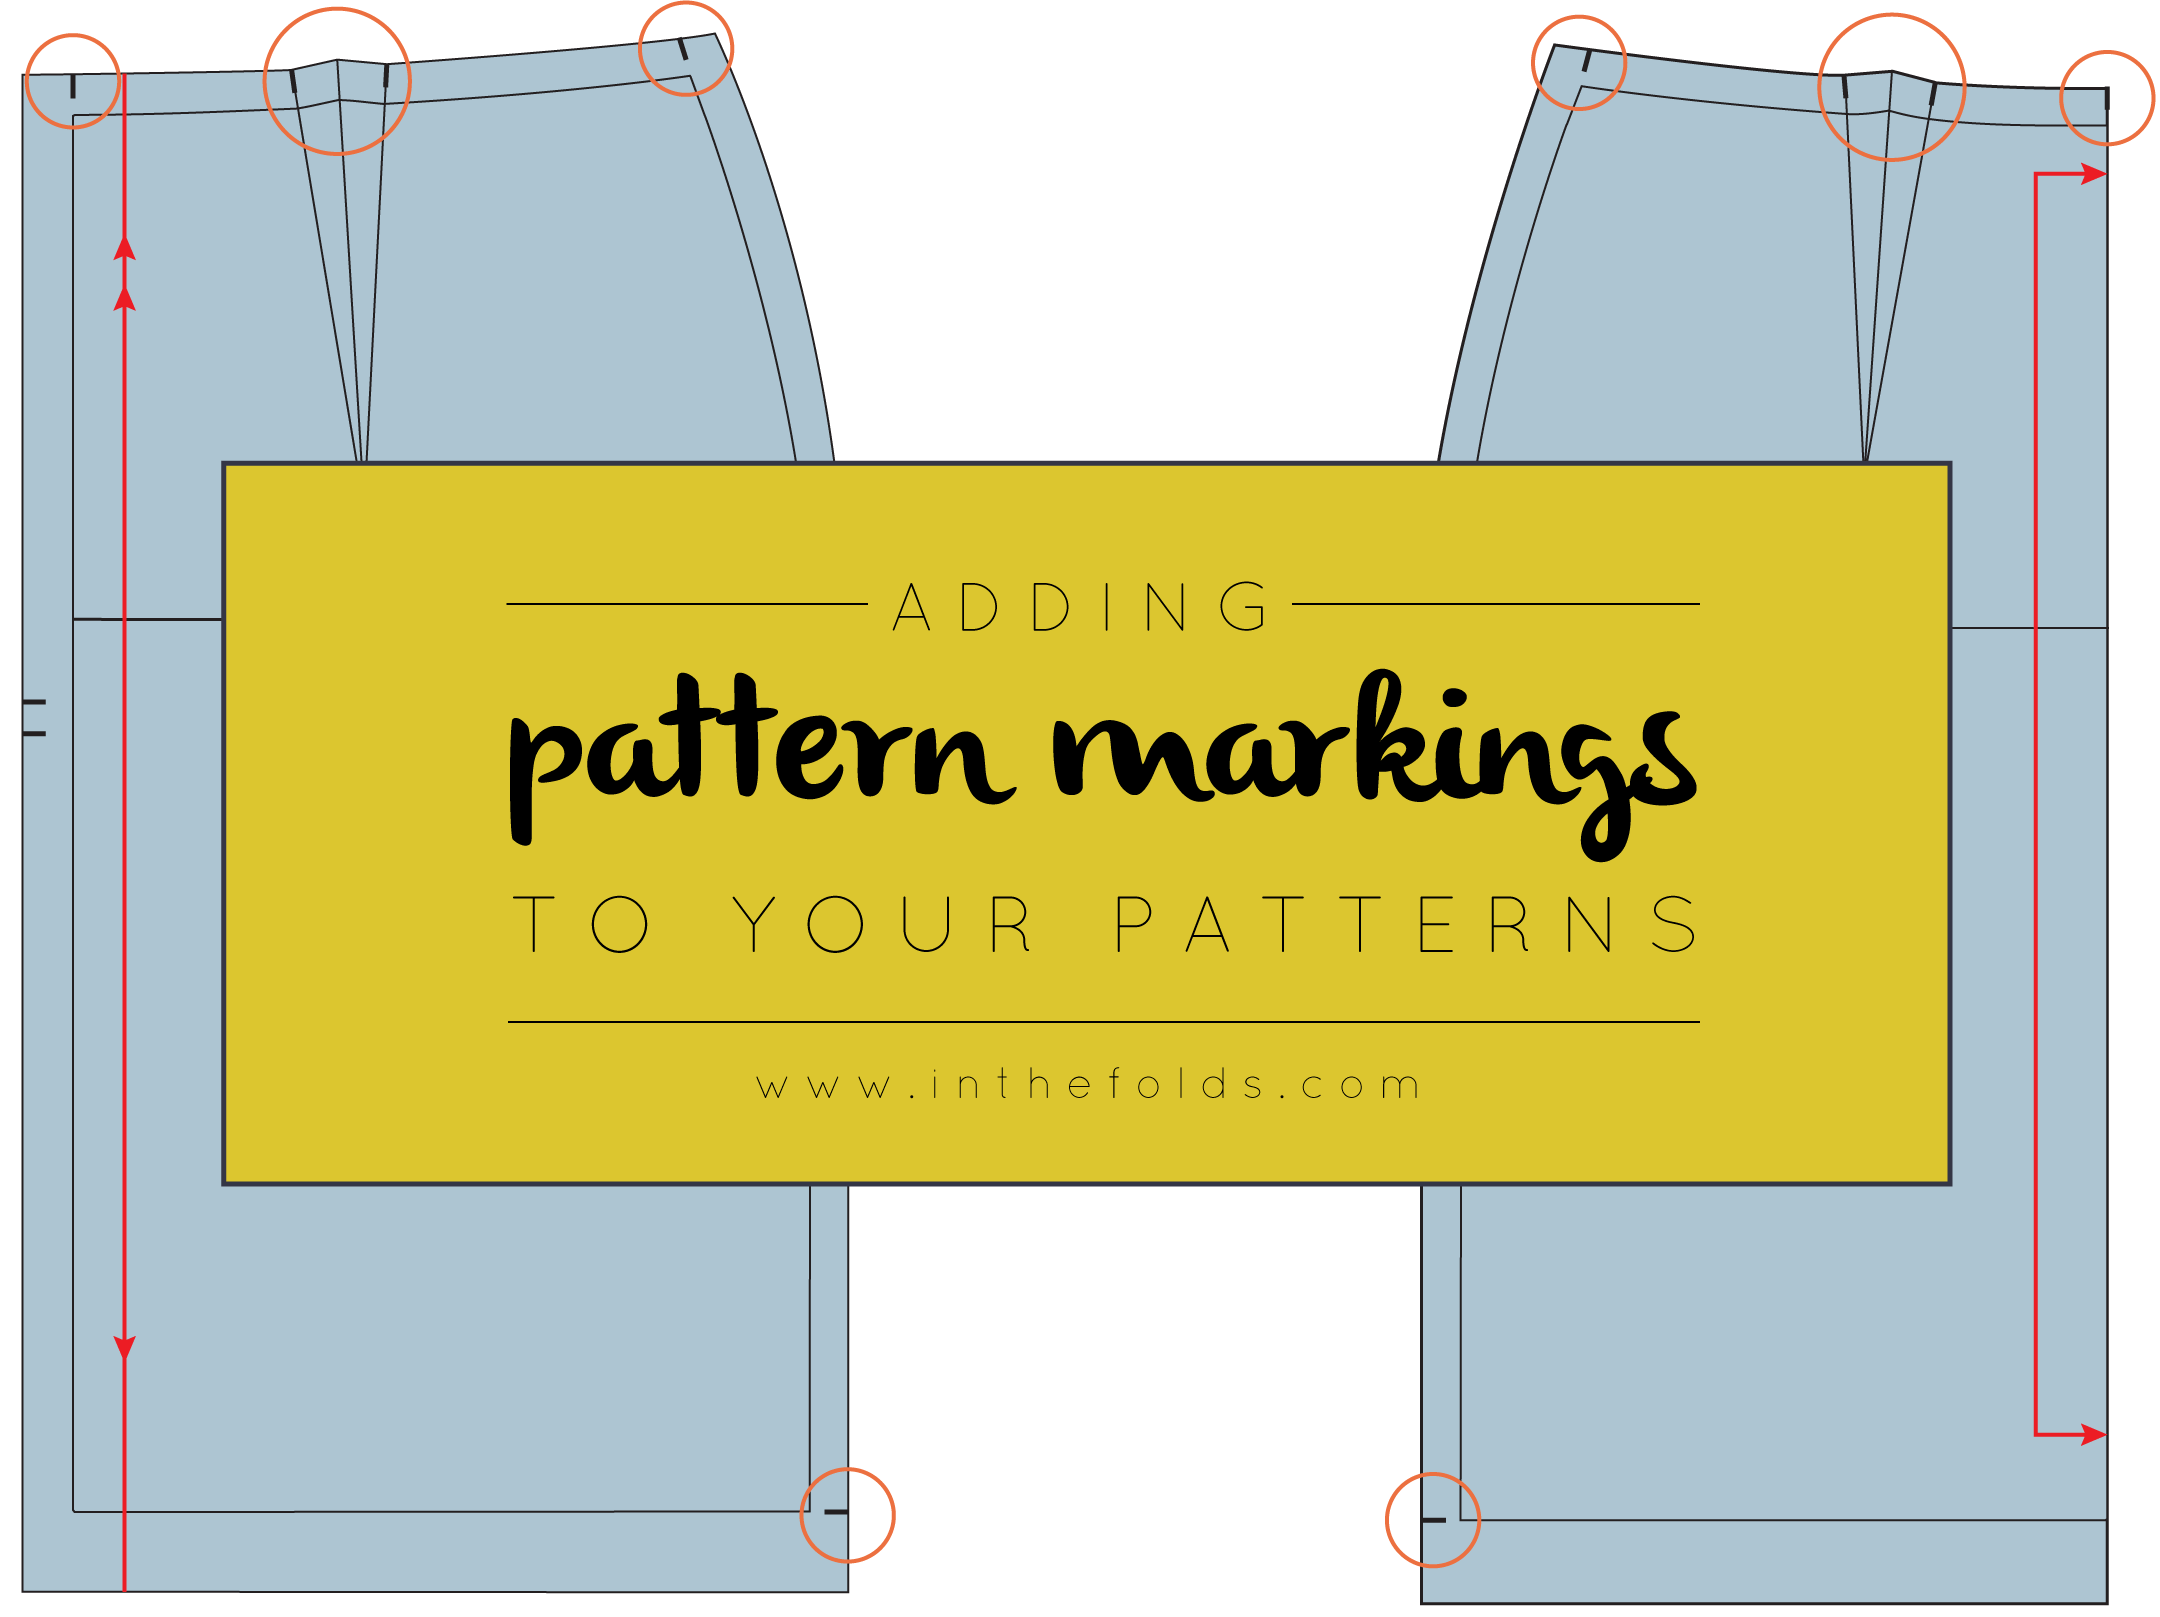
Adding Pattern Markings To Your Patterns In The Folds

Sarah Shirt Sewalong Cutting Marking Stabilising Your Fabric By Hand London

Learn To Sew Get The Scoop On Pattern Layout For Cutting And Marking Sew Sew Lounge
![]()
Marking And Transferring Darts From Pattern To Fabric Doina Alexei

Blog Sewing Lesson Fitted Blazer 101 10 2018 Burdastyle Com
Adding Pattern Markings To Your Patterns In The Folds

Sarah Shirt Sewalong Cutting Marking Stabilising Your Fabric By Hand London

Sarah Shirt Sewalong Cutting Marking Stabilising Your Fabric By Hand London
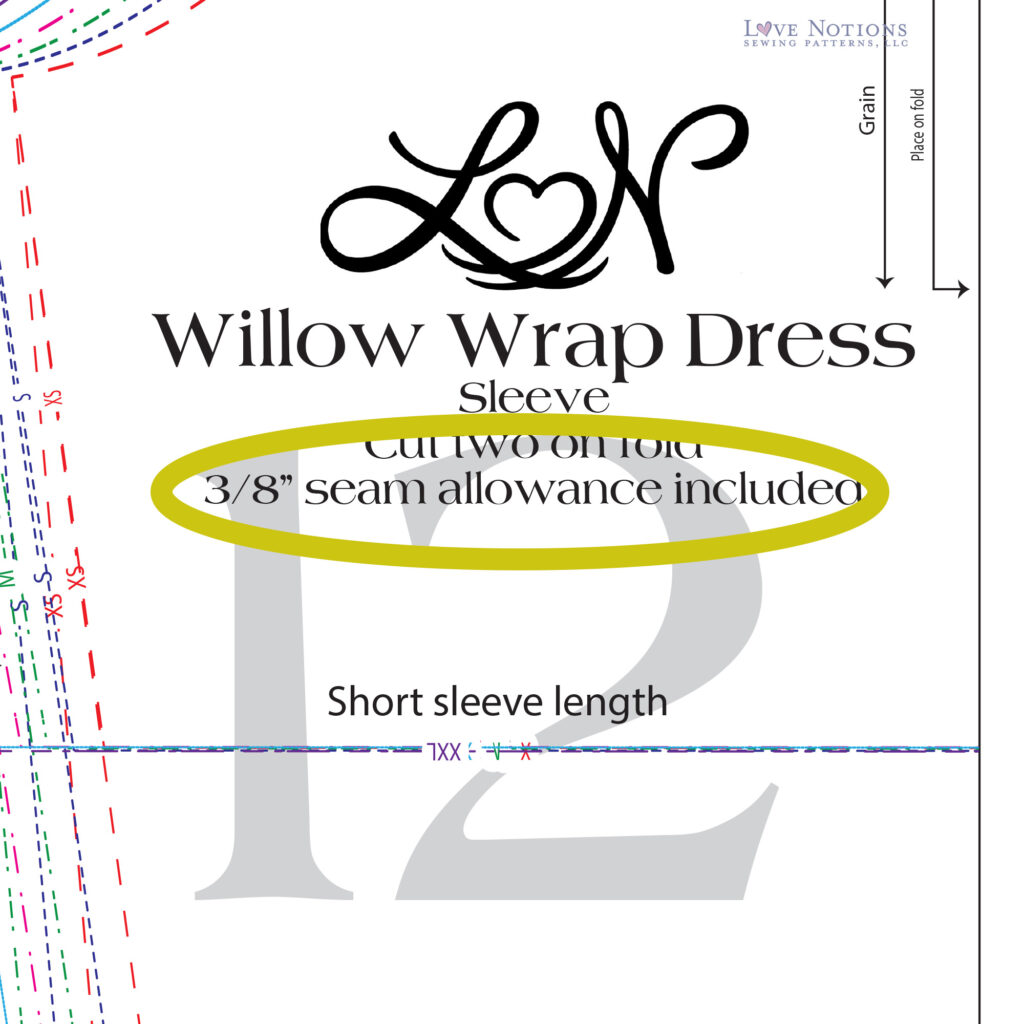
How To Interpret Pattern Markings With Willow Wrap Dress Love Notions Sewing Patterns